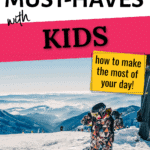
Have you been wondering about the best snowboarding gear for kids? I’ve got you covered!
I’m stoked (pun intended 😜) to help you gear up for some epic powder days with your kiddos.
We’ve been snowboarding with our kids for almost 12 years now, strapping snowboards to their feet for the first time when they were tiny toddlers.
Needless to say, we’ve had plenty of time to test a mountain of winter gear for kids. Some of it was awesome, some of it not so much.
So, whether you’re just thinking about taking your little ones snowboarding for the first time, or you’re a seasoned shredder looking to update your kids’ snow gear, you’re in the right place.
We’ve been there, we’ve done that (making our fair share of mistakes along the way), and we’ve found the absolute must-haves for a super fun, safe, and unforgettable snowboarding experience with your kids.
Must-Haves for Snowboarding with Kids
I cover more details below, but here’s a quick run-down of our top picks for the most important kid’s snowboarding gear you’ll need:
- Kids’ Snowboard & Bindings
- Snowboard for Toddlers and Little Kids (up to around 50 lbs): Burton Riglet paired with Burton Mini Grom bindings OR Kids’ Burton After School Special
- Beginner Snowboard for Kids (40-100 lbs): Burton Grom Snowboard + Bindings
- Snowboard for Kids Ready to Progress: Lib Tech Banana Blaster BTX + Union Cadet Bindings (Made in Washington State, USA)
- Kids’ Outerwear
- Kids’ Snowboarding Suit: Burton One-Piece Toddlers or Airblaster Kids’ Freedom Suit
- Kids’ Snowboarding Bibs: Burton Bibs for Toddlers or Volcom Barkley Insulated Bibs for older kids
- Kids’ Snowboarding Jacket & Pants Set: This high-quality Burton set has a ton of features that are often reserved for adult gear.
- Kids’ Baselayers & Midlayers
- Airblaster Ninja Suit baselayer paired with Patagonia R1 Air Kids’ Hoodie or Down Sweater Hoodie midlayers as needed.
- Kids’ Snowboard Socks
- Darn Tough (love the lifetime warranty!) or Smartwool
- Kids’ Gloves and/or Mittens
- Burton Mini Mittens or Dakine Scrambler Mittens for toddlers
- For big kids, try the Dakine Avenger GORE-TEX, Burton GORE-TEX, or Crab Grab Cinch Mittens.
- Kids’ Helmet
- Kids’ Goggles
- Kids’ Head and/or Neck Coverings
- Usually, our kids prefer balaclavas, but having a midweight neck tube and a warm fleece option is a great idea.
- Gear Bags
- We’ve had (and loved) our Dakine Boot Bags for years!
- Pocket Snacks
- Filling pockets with satisfying snacks like jerky, nut butter, and granola bars helps to keep everyone happy on the slopes.

Must-Haves for Snowboarding with Kids: Gear & Accessories
So, what is this magic we speak of?!?
Unfortunately, it’s not really magic..it boils down to having the right gear and being organized.
I know, I know – easier said than done, but stick with me. It will pay off.
Just like working out with the kids to be ready for the season. I promise!
Hopefully, our trial and error can help you choose the right gear from the start. Below you’ll find all the things we consider essential for successful shred trips.
But, first I have a quick story for you about the importance of having the right gear AND keeping it organized.
Skip the story and jump straight to the snowboarding gear.
A few years ago, we were traveling to our favorite local mountain to take the kids snowboarding when I made a big mistake.
We were planning to help the boys learn the basics on the magic carpet.
Anyway, we get all the way to the mountain (2+ hrs away) and start unloading. We pull everyone’s gear out and realize our youngest’s outerwear is missing. Oops. 🤦♀️
So, inside we go to find a replacement…there’s no way we’re turning around at this point! We find a one-piece Burton snowsuit, take the tags off, finish getting ready, and (FINALLY) get out on the mountain.

At the end of the day, we head back to the car and, lo and behold, what’s sticking out from under the front seat?!? The missing outerwear. 😩 Thankfully, that “replacement” snowsuit quickly became our favorite and he ended up wearing it for at least 2 full seasons.
Needless to say, we realized that we needed a better system to make sure we didn’t have any repeats, requiring us to purchase unnecessary gear. It took us a little while, and some trial and error. But, over the last few years, we have been perfecting our packing process for snowboarding.
As the boys have gotten older, we have gone from boarding occasionally, to once or twice a month, to now at least every other weekend during the season. At first, we were always struggling to figure out what was essential and what was unnecessary bulk.
We have FINALLY gotten a system in place that we are happy with. Now, we have it set up so that we have what we need for a weekend AND once everything is dry, it’s pretty much ready to go for next time.
The two key pieces of this system are: Gear Bags for Each Person and a Snowboard Checklist.

1. Kids Snowboard and Bindings
Both of our boys started out on a Burton Riglet. It’s the perfect first snowboard for little shredders learning the ropes.
One of our favorite features is the Riglet reel that allows you to pull them around while they’re learning.
But the coolest part is that it doesn’t just work on snow. It’s also designed so that you can pull them on other surfaces at home while they’re learning, such as your front lawn or even your hallway carpet!
We found that letting our boys get comfortable on the board BEFORE adding in all the extra bulky gear and cold weather was a game-changer.
When you’re ready to hit the slopes, a pair of Burton Mini Grom bindings are a great choice because you can use them with regular snow boots until they’re ready for (or fit into) snowboard boots.
Plus, regular snow boots are easier to walk in for early walkers. Both of our boys started with this combo, and it was perfect!
Another option is the Burton After School Special, which is already paired with bindings.
When your kids are a little older or are ready to level up to their next board, you can learn more about what to look for when buying a snowboard to keep them progressing.
Here are a couple additional solid options to consider:
- Burton Mini Grom – Little Kids’ – A true twin snowboard designed to prevent new snowboarders from catching an edge. It’s flat in the middle with rocker at the tip and tail. Snag it with a pair of bindings in this package or with boots and bindings here. (These packages are bundled together at regular price unless they are on sale, which they are as I’m writing, so always worth checking!)
- Lib Tech Banana Blaster BTX – This board is great for groms ready to progress a bit using the Original Banana shape with a bit of camber underfoot and rocker in the center. Snag it with a pair of Union Bindings in this bundle.
🤩 I love this beginner kids’ snowboard because you can practice at home before you even hit the slopes!

2. Waterproof and Breathable Outerwear
Outerwear is where we spend the bulk of our money on gear – well, if you aren’t counting boards, that is!
When looking for what to wear when snowboarding, you’ll want to look for waterproof and breathable outerwear to keep everyone dry and comfortable.
Gear that is waterproof helps kids to stay dry (super important with the wetter snow at our PNW ski resorts!) and outerwear that is breathable will assist in regulating your temperature.
This guide on finding snow pants and this one on finding the best winter jacket will help you know EXACTLY what to look for.
But if you’re in a hurry, here are some options we highly recommend for kids:
- Kids’ Snowboarding Suit
- This is the updated version of the one-piece suit our youngest had. We loved how easy it was to get on and off, that it kept snow out of his pants, and the was one of our favorites when the kids were little. There’s also a version for bigger kids!
- Our youngest also has this Airblaster Freedom Suit, which he loved so much, we bought it again in a larger size when he outgrew it. I love that it has a slightly better waterproof and breathability rating, which has been great in the PNW as he progresses and is able to spend more time on the snow.
- Kids’ Snowboarding Bibs or Pants
- We tend to prefer bibs over pants (less chance for snow to get down pants or up jackets). Try out these Burton Bibs for toddlers. For older kids, these Volcom Barkley Insulated Bibs are a great choice with extendable pant legs, leg vents, and the Zip Tech interface to easily integrate with compatible jackets.
- Kids’ Snowboarding Jackets
- This Volcom pullover jacket is Zip Tech compatible and has vents (pit zips) to help regulate temperature.
- Kids Snowboarding Pants & Jacket Set – If you’re looking for the best quality for your little snowboarder, this Burton set is worth considering. While not the least expensive set, it has features that are often skipped on kid gear, such as thigh and armpit vents, GORE-TEX, fully taped seams, and high waterproof (28000 mm) and breathability (20000 g) ratings.
🤩 I love one piece snowsuits for toddlers and little kids becuase they are easy to get on and off & they keep snow from getting down their pants.

3. Warm Baselayers and/or Midlayers
If you’ve ever seen us at the mountain or talked with us about gear, you’ve probably realized that we LOVE our Airblaster Ninja Suits – especially for the kids!
They are the ultimate in base layer comfort and are a great, warm option. Plus, they come in super sweet designs and are easy for younger kids to put on by themselves. 🙌
When it’s hovering around 28-32°F here in the PNW, it’s the only base layer we need.
If it’s much colder than that, we will add a mid-layer – think fleece pants, wool layers, or down jackets.
Other great options are:
- Burton Fleece Baselayer Set
- Smartwool Kids’ Baselayer Top and Base Layer Pants
- For midlayers, the Patagonia R1 Air Kids’ Hoodie or Down Sweater Hoodie are excellent choices.
❄️ Our kids love the comfort and warmth of Airblaster Ninja Suits.

4. Snowboard Socks
When it comes to finding the best socks for snowboarding, think warm, wool or wool-blend, thick (but not too chunky), well-fitting socks.
For the kids, they seem to like just about any of the wool blends, so we usually go with Smartwool or Darn Tough.
🧦 My preference for kids’ snowboard socks is Darn Tough because they have a lifetime warranty and hold up through multiple kids. 🙌

5. Gloves or Mittens
We’ve gone through several different types of gloves and mittens over the years – for the kids as well as ourselves.
Ultimately, we discovered we all prefer mittens over gloves. When it’s cold, our hands stay warmer, it’s easier to pair with a liner glove for warmth, and they are easier to take on and off.
We’ve also learned that until the kids are at least 8 or 9, it’s not worth it to waste your money on super expensive, ultra-fancy gloves. Waterproof, warm, and reasonably priced is your goal.
Because chances are they’re going to pull them off or get snow inside them at some point anyway.
They will get lost, torn from digging in the snow, or a hole bit in them while riding the lift (yup! This has happened….more. than. once.)
You should be able to find decent kids’ gloves for no more than $20-60. Check out Dakine, Burton (watch for sales!), or even Costco. We’ve found the Dakine and Burton tend to hold up better but are also a little more pricey to replace.
We also like to have a backup set for each kid until they learn to keep them on consistently. That way, if they do get too wet and cold (or if they lose one), we can swap them out without having to shell out a ton of money for limited options at the mountain shop.
Here are some kids’ snowboarding mittens we recommend:
- Burton Mini Mittens or Dakine Scrambler Mittens for toddlers
- For big kids, try the Dakine Avenger GORE-TEX, Burton GORE-TEX, or Crab Grab Cinch Mittens.
🏂 Try Burton Mini Mittens for Toddlers or Dakine Avenger for Big Kids

6. Helmet
Before kids, we took the risk and rode without helmets – probably not our smartest move. 😬
However, now we all ride with them – the risk just isn’t worth it. Protect your brains!
We opt for helmets with MIPS. There’s a lot of technology behind the system, but suffice it to say, that if you take a big spill, it decreases your chance of brain injury – always a good thing!
Pro-tip: Buy the kids bright, fun colors for their helmets. They love it, and it makes them so much easier to spot from a distance!
Here are some of the best snowboarding helmets for kids based on our experience:
- Great options for kids’ snowboard helmets: Smith Glide Jr. MIPS or Giro Neo Jr. MIPS
- If you prefer an integrated helmet and goggle setup, check out the Smith Survey Jr. MIPS or Giro Buzz MIPS Helmet. (Full disclosure, we haven’t tried these particular styles, but have had great luck with these brands.)
🏂 Bright colored helmets like this one make kids easy to spot on the slopes.

7. Goggles
One of the most important things when it comes to choosing snowboarding goggles is how they fit with your helmet. What you’re looking for is minimal to no gap between the top of your goggles and your helmet.
We recommend finding a helmet that works for you first, then taking it to your local shop and trying them on together to find the perfect fit.
However, if that’s not possible for you, stick to the same brand of helmet and goggles. You will be more likely to get a seamless (or close to it) fit.
You could also opt for integrated goggles on your kids’ helmet to eliminate issues with fit and twisted straps.
Again, for the little kids – functional and inexpensive is your goal. They will roll around in the snow, smack into things, and scratch the heck out of them…you can always upgrade when they are a little older.
A few of our favorite brands over the years have been:

8. Head and Neck Coverings: Balaclavas, Face Masks, Neck Warmers, Head Socks, Etc.
When you’re out in the cold and wind, whether it’s snowing or not, keeping little faces and necks warm is super important.
There are a lot of options out there to keep your head cozy, so you can find what suits you best.
Balaclavas are designed to cover most of the head and face and are usually designed to be worn under a helmet.
Head socks are thin coverings that can wick moisture, provide a bit more warmth, and also protect hair from snags in your helmet. It also keeps any sweat from ending up directly on your helmet, reducing odors.
Our ninja suits have hoods, so if you go that route, a head sock or full balaclava isn’t necessary. However, you may still want to grab a face mask or neck warmer to shield you from the wind and cold.
We all have a thinner, lightweight to medium-weight version (polyester or merino wool) for mild days and then a warmer version (fleece is common) for the colder days. But, most days, our kids opt for balaclavas.
❄️ Our kids prefer balaclavas in most conditions.

9. Individual Gear Bags for Every Family Member
One of the things that has been a complete game changer for us – and prevents us from forgetting important gear (like our kids’ outerwear 😅) – is having a separate gear bag for each person in the family.
We know there are a bunch of people in the “toss all the gloves and hats in a communal bin” community, but that just has not been a great solution for us.
Communal bins mean digging through to find everyone’s stuff (and more chances for something to get dropped in the snow). In the PNW, this often also means more time standing around next to the car getting cold and wet – no beuno for keeping the kiddos (or mama) happy!
We are firm believers in having a separate gear bag for each person. You don’t have to have fancy bags for this…any duffle bag can totally fit the bill.
However, we really like our Dakine Boot Bags!! We’ve had the prior version of these for years and they hold up great over time.
We opted to buy adult-size bags for the kids instead of smaller kid-specific bags that would need to be sized up in a couple of years.
They were a little big for them at first, but easy enough for one of us to carry two into the lodge when needed until they could comfortably wear the backpack. Though truth be told, we typically gear up at the car, so it’s not usually an issue.
If you have a long walk or need extra hands to carry a toddler or infant, you may find it better to purchase the smaller Big Kids’ Boot Pack and upgrade as they grow.
They are set up for being able to hold everything you need for a day on the slopes in a way that makes everything easy to access. They have a compartment lined with tarp-like material for boots on the back, a top zipper for helmets, goggles, and face masks and two side zipper pockets perfect for socks and gloves.
There are also two front zipper pockets (one insulated) and a spot to label on the back. These bags are on the big side for the boys, but they have had no issue carrying them from 6 years old and up.
🏂 We love Dakine Boot Bags to transport and organize our gear.

10. Pocket Snacks (or Trail Snacks)
Put kids in an environment with lots of physical exertion and at least a 15-minute trek to food and a bathroom (thank goodness we have boys!) and you’re sure to have at least one “I’m STARVING and I CAN’T wait” meltdown.
We learned early on that bringing snacks for snowboarding (we like to call them pocket snacks) is absolutely essential.
But what should you bring? Snowboarding snacks can be essentially the same things you would take on a hike.
When the boys were little, we would carry granola bars and a pack of skittles and slip them a few when they were starting to melt.
Now, though, we load their pockets up at the beginning of the day with 2-3 high-energy snacks.
Some of our favorites are jerky sticks (we like Chomps), nut butter packets (Justin’s or Fbomb are some of our favs), and protein or granola bars (we like 88 Acres, Larabars, and Clif Bars).
Our youngest had a peanut allergy from 10 months until he was 10, so we also have a lot more ideas in my post on Allergy Friendly Pocket Snacks.
😋 High-energy, satisfying snacks like jerky, nut butter, and granola bars keep hangry meltdowns at bay.

Bonus: Patience
Last but definitely not least – bring all the patience you have!!
And, then remind yourself – it’s probably still not enough.
You will not be getting in tons of hot laps. The terrain will not be all the same terrain you used to ride.
You WILL take more breaks…probably way more than you want to. You will get frustrated and just want to RIDE, already!!
There will be meltdowns and whining – yes, even from the kids!
But it’s not about what you are missing out on. It’s not about getting in the most vertical or a new trick. It’s about sharing the love of snowboarding and passing on the stoke to the next generation. 🏂🤙
FAQs About Snowboarding with Kids
When should I start teaching my child to snowboard?
Whenever you feel they’re ready! There isn’t a hard-and-fast rule for the right age to start teaching your child to snowboard. Our kids started learning to balance on the board around 18 months. Many resorts don’t start lessons to learn basic snowboarding skills until somewhere between the ages 3-5. In the early years, it’s all about keeping it fun and letting them progress at their comfort level!
Should my child learn to ski or snowboard first?
Whichever they’re motivated to learn first. While toddlers can sometimes struggle with the balance needed to stand sideways on a snowboard, their interest level plays a huge roll. Our youngest kid had zero interest in skiing. He wanted to snowboard like the rest of us and forcing him to ski instead would have taken the fun out of the entire experience.
How can I make my child’s first snowboarding experience enjoyable?
Keep the first trips fun and stress-free. Allow plenty of time for breaks, playing in the snow, and bring lots of snacks. Remember that the goal early on is to have fun and instill the love of snowboarding, not to become an expert on day one.
My child seems frustrated after a few tries. What should I do?
Take a break! Patience is key when learning a new sport, like snowboarding. There will be days when they only want to play in the snow and drink hot chocolate. And that’s okay! The goal is to make the mountain a fun place first and foremost. Keep encouraging them, reminding them that falling and making mistakes is normal, and celebrate small wins like making their first turn. They’ll get there before you know it!
💰 To save money on good snowboarding gear for kids, we love shopping the sales & outlet at evo.
Final Thoughts: Snowboarding with Kids
Snowboarding with kids is one of the most rewarding adventures – not only are you having fun outdoors together, but your kids will learn and grow so much from the experience.
We’ve seen our kids learn perseverance, understanding, patience, and courage through snowboarding. And as parents, we’ve learned a lot about ourselves as well.
From beginners to seasoned riders, having the right gear and attitude can make all the difference in making your family’s snowboarding trips enjoyable and memorable.
Now that you know all the snowboarding essentials for your kiddos, learn more about the snowboard gear you need for yourself.


 16")


